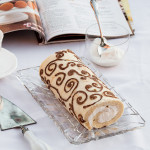
Designed swiss roll
Prep time
Cook time
Total time
Step by Step instruction and recipe for a beautifully decorated Cake Roll as featured on Food Network.
Author: Lail Hossain
Recipe type: Dessert
Cuisine: American
Serves: 8
Ingredients
- * For filling -
- ¾ cup heavy cream
- 2 tablespoons powdered sugar
- ¼ teaspoon vanilla extract
- * For cake -
- 5 eggs, yolk and whites separated
- ⅝ teaspoon cream of tartar
- ¾ cup caster sugar, divided
- Pinch of salt
- 1 teaspoon vanilla extract
- 1½ tablespoons lemon juice
- 2 tablespoons butter, melted
- ¼ cup heavy cream
- ¾ cup all purpose flour
- 1 tablespoon cocoa powder
Instructions
- Prepare the filling in a bowl by Beating the heavy cream with powdered sugar and vanilla until stiff peak forms. Cover and refrigerate until ready to use.
- Make meringue by beating egg whites and cream of tartar with a pinch of salt until frothy. Slowly add in half the sugar and beat until stiff peak forms.
- In a separate bowl, beat egg yolks with the remaining sugar until light and pale yellow and custardy. Add vanilla, lemon juice, melted butter and heavy cream until incorporated.
- Sift the flour into the egg yolk mixture. Fold until the dry and wet ingredients are just combined.
- In a separate small bowl, take 3 tablespoon of the egg yolk mixture and 6 tablespoon of meringue (the egg white mixture), and 1 tablespoon of cocoa powder. Gently fold until the ingredients are incorporated.
- Line a 10 X 15-inch baking pan with parchment paper.
- Fill the colored cocoa mixture into a prepared piping bag. Gently squeeze the piping bag to release batter and draw the desired pattern using the tips below. Remove the paper under the parchment if you were using one.
- Preheat oven to 350 degree Fahrenheit.
- Bake for 5 minutes or until decorative patterns are set.
- While the pattern is baking, gently fold in the remaining meringue into the egg mixture in three batches. Be careful not to deflate the egg whites.
- When the patterns are done baking, pour the cake batter on top and gently spread the batter into an even layer.
- Bake cake for 10 minutes, or until a tooth pick inserted comes out clean.
- Remove cake from oven and cool on a wiring rack.
- Roll the cake using tips below.
- Wrap the filled cake with plastic wrap and refrigerate for at least an hour, or until ready to serve.
Notes
Take the parchment paper large enough to have at least 2-inch excess on all sides of the baking pan.
I used lemon juice to make a plain sponge cake. You may substitute the 1½ tablespoons lemon juice with liquid coffee for mocha flavor, pandan juice for pandan flavor, beet juice for a red velvet decorated cake roll.
You may substitute 1 tablespoon cocoa powder with matcha, coffee, green tea or food color of your choice to create the patterns.
* Drawing the pattern:
If you are great at drawing, you can free hand and pipe the design directly on the parchment paper. For others, it may be easier to make a template first. Take a piece of paper as big as your baking pan so the paper fits well in the pan. Pencil your design first so you can erase if need to. Once you are happy with the pattern trace it with a marker so that the design will show through easily. Use the pattern sheet as your template and put the parchment paper for the cake on top of the template to draw the design with pastry tip.
*How to roll cake:
After removing the cake from the oven, cool a little. While the cake is still warm, roll the cake and parchment together. The parchment will end up coiled inside the cake. Cool the cake on a wire rack. After an hour or so when cake is completely cool, unroll and remove the parchment. The cake will be slightly wavy. Proceed with spreading the filling. Re-roll.
*Tips to handle piping bag:
Place the piping bag in a tall cup for filling so you won't have to hold while stuffing the bag.
Pipe out a small line on some extra paper to work out any air bubbles.
Filling the piping bag loosely will result in lots of air bubbles and the outcome sloppy and scribbled writing.
Recipe by WithASpin at https://withaspin.com/2014/05/05/decorated-swiss-roll/